The playing field of "Pipeline" consists of tiles lying next to or on top of each other, most of which can be removed by clicking with the mouse. As soon as a tile is removed, an adjacent one (from above, below, right or left) takes its place and thus moves the game forward. In this respect, the game resembles a simple "sliding puzzle", but it is considerably more diverse in terms of appearance and content. There are random generators, elements that move on their own, and much more. Everything is controlled entirely by mouse.
In addition to removable tiles, there are also fixed blocks that can neither be removed nor moved. This is in complete contrast to the "pipe tiles". These must ultimately be used to build a pipeline from A (the energy source) to B (the destination point), including certain intermediate points, the so-called "ports". A level can only be completed when all pipes and all ports on the playing field have been integrated or connected.
After fulfilling all the conditions of the game (we will talk about further rules later), a switch (water tap) appears at the top of the playing field, which starts the flow of energy after a mouse click. If this reaches its destination, the game level is successfully completed. The video below shows the solution of a simple pipeline level. Although not all elements are represented here, you get a first impression of the game, can familiarize yourself with the physics of the game and observe how the basic elements function and interact with each other.
In this video, the player does not make a mistake, especially avoiding premature connections of the pipes by always aligning them correctly. This will be more difficult with more challenging game levels (than here in the video). Then it will often be necessary to go back and forth (via UNDO function) to find a solution.
As already mentioned, the starting point of the pipeline is the energy source and the end point is the 3 target fields at the bottom of the playing field. The course of the pipeline is significantly influenced by the ports, which must be included without exception, but quite different pipeline courses are often possible on one and the same level. By the way, it is up to each player to decide where to start and where to finish, i.e. there is no fixed order for building the pipeline. It is also possible to connect the target field first and the source last, or to start building at a completely different place.
If one of the target fields has been connected, the remaining 2 can no longer be used as a connection. Often, fixed blocks prevent the shortest connection between 2 ports. If these blocks (or walls) are yellow, a maximum of 3 of them can be removed; but this does not work with gray blocks. The remaining elements will be discussed later.
As you can see in the video, the pipes still have a closed ring shape at the beginning, but they are already movable (horizontally and downwards, but not upwards). If you click on the pipes with the mouse, you change their orientation. This is not only important to assemble a pipeline correctly, but also to avoid premature assembly.
In this respect, the player should always have the following basic rule in mind and observe it when navigating: As soon as the connections of two pipes touch, they join and become immobile. As long as the pipes are in the ring shape, this cannot happen, so one should maintain the closed shape as long as possible. At some point, however, a pipe must be opened in order to navigate upwards or to be able to connect.
Short-term deactivation of pipes and sand
If a tile is removed by clicking on it in order to move a certain pipe, it often happens that another moving element could also take this vacated place (50:50 probability). If you want to avoid this, you can (in the case of sand and pipes) switch the element that should not move to passive for 3 seconds by using the 3 buttons on the upper right edge of the playing field. In the video below, the vertical pipe should move upwards. However, it would also be possible for the upper corner pipe to fall down. So you deactivate it for a short time by clicking on the corresponding button. The corner pipe turns gray and the vertical pipe moves upwards as desired when the tile is removed.
Beware of premature "Game Over"
The "falling" sand is also dangerous. In the video below, the player hastily wants to connect an open pipe to a port and overlooks the fact that he is moving under a block of sand, so that an open pipe comes into contact with the element of sand.
During the game, always pay attention to the remaining balance, which is displayed on the right in the game panels. When the balance reaches zero, the game is also over. The picture below shows the entire programme interface during a game. On the left the game panel, on the right the scoreboards including the tape recorder and other control buttons including UNDO/REDO. By right-clicking on the picture (browser dependent), you can have it enlarged and displayed in a new tab.
Helpful elements
Basically, the aim is always to build the pipeline with as few clicks and short distances as possible. The lateral transporter elements can be very useful for this. They are located on the left and right edges of the playing field and serve to transport pipes that are close by to the distant other side of the playing field more quickly. To do this, the pipe rotation must be set to the horizontal pipe and the same must be moved directly in front of the "transporter element". The rest is automatic: the pipe is pulled in from the right transporter and comes out of the left transporter and vice versa (see video below).
Block removal
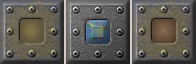
Due to unfavourably located blocks, the pipeline would often have to take long detours and the available pipes would not be sufficient. In this case, it is possible to remove a maximum of 3 blocks (simply by clicking). But consider carefully whether this is really necessary, because each removal of a block reduces your credit considerably.
Using the "Wireless Port Connection" (WPC)
This is also an option if the pipes are not sufficient: You connect 2 ports invisibly or wirelessly (just as you like) and thus bridge the distance between them without using tubes. This only works with ports that are already connected on one side. You click on them with the mouse and a small device is created at the end that is not connected, which acts as a transmitter or receiver.
Of course, the same must be done for the port that is to serve as the destination for the invisible connection. Later, when the energy flow is started, the energy flows from one WPC port (connectionless) to the other WPC port. If you use "WPC" even in levels where it is not necessary, this will significantly reduce your credit so that resolution will no longer be possible.
Look at the start picture of the video below. The pipeline there is still open at 2 points and the green line indicates what is meant by "WPC". Now start the video and watch the rest of the solution.
Elements in detail
The picture on the left shows the still unconnected source. All 4 sides connect immediately when an open pipe touches them. If you only want to navigate past this element, you should align the pipes accordingly to avoid an unwanted connection.
As soon as the source is connected, it takes on this appearance and its lateral sensitivity also goes out, i.e. you can now safely navigate past it.
Here you can see a target field in an unconnected (left), connected (centre) and sanded state (right). The target fields are always at the bottom of the field and can therefore only be connected from above.
Alternative target field: Can be ignored, can be connected from all sides, can be rendered unusable by sand and disappears as soon as a normal target field is connected. Conversely, the latter become unusable when the alternative target field is used.
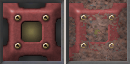
When the game starts, the pipes exist only in a closed ring shape (see picture). You can already navigate with them without running the risk of connecting unintentionally. As soon as you click on it, it becomes the first connectable pipe shape, namely the horizontal pipe (see below). It is no longer possible to return to the closed form.
With a click you can switch between these 6 pipe shapes and use them to navigate, connect or avoid connection. Once connected, they are part of the pipeline and immobile.
The "ports" rotate around themselves until they are connected to at least one side. After that, they also become a fixed part of the pipeline. Both port connections must be connected in order to successfully complete a game.
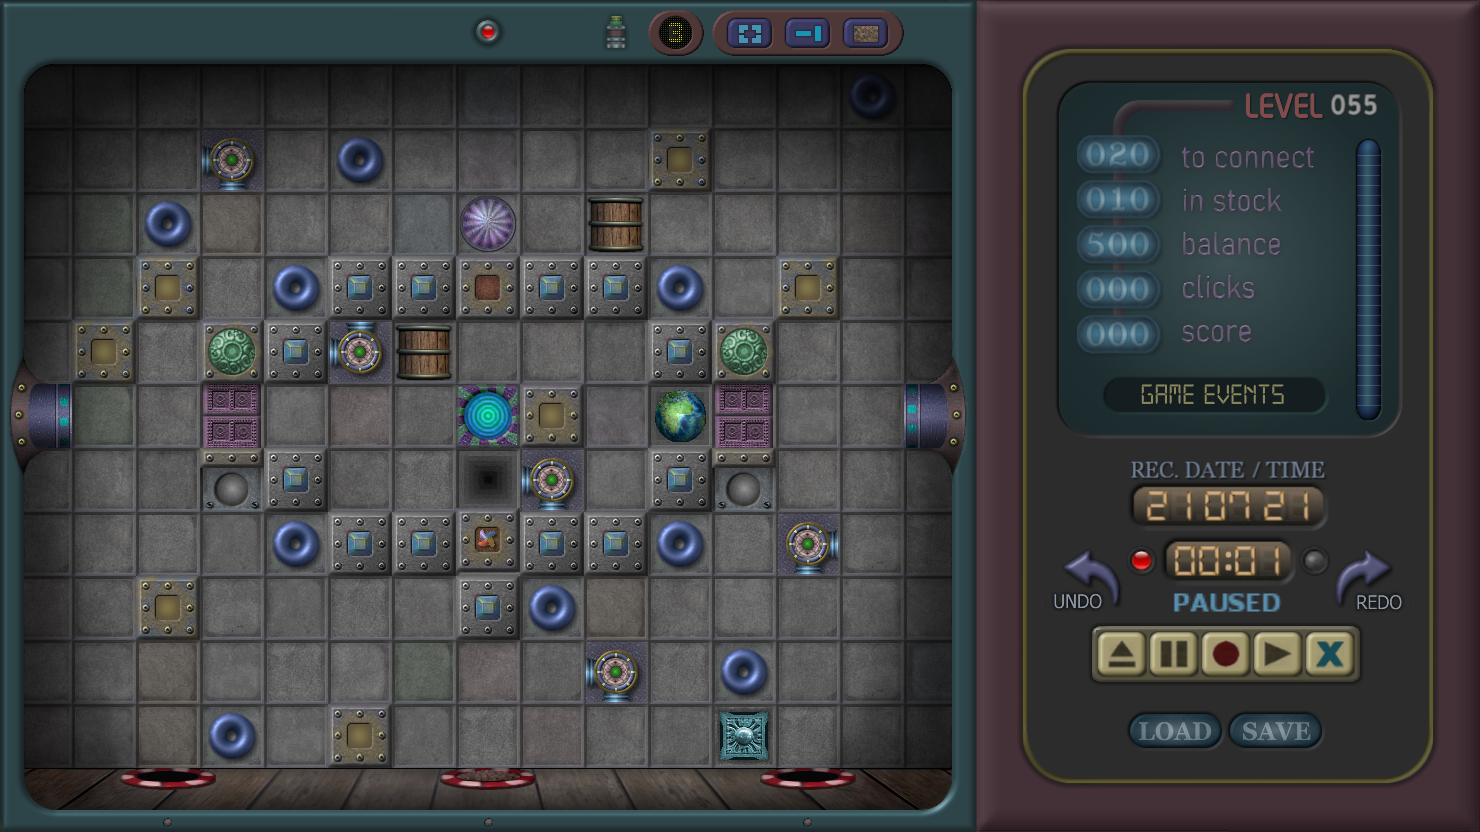
Base walls: The yellow ones (left) can be removed by clicking, as can the brown ones on the right after the sand has been emptied. The grey walls (centre), on the other hand, are unchangeable. All base walls absorb sand that hits them from above and also release it again when you remove the tile below them.
This wall element can be useful as an additional pipe connection. With a click, one sets whether it is to be used horizontally or vertically. As soon as this is done, open pipes that touch it at the connection points are connected.
This barrel must be moved (required) into one of the target fields, which simultaneously increases your credit by the value 25. It can catch sand and is also the only element that can dispose of the fragile globe.You can only move it left, right and down.
Clicking on the storage element brings new pipes into play. When the stock is empty, it turns grey and can no longer be used. The number of pipes still available can be checked at any time in the scoreboard on the right "in stock".
The "globe" element must be removed from the playing field in order to finish the game. This is done by dropping it into a barrel (container). But be careful, if the globe falls elsewhere, it will break. Also, if it is hit from above or comes into contact with another globe. The destruction of the globe also means: Game Over.
The door element (centre) opens after clicking on the green button above it; the number of possible crossings is displayed below. The door opens a maximum of 5 times and can then no longer be used. Since the respective opening time is only 3 seconds, it is necessary to place the element that is to be passed through in front of the door before pressing the opening button.
If there are several doors in a level, please note that this does NOT increase the number of possible crossings. All doors open and close at the same time and if you want to move more than 5 elements through the doors at different locations, you must do this at the same time.
Movable blocks and movable ports
Both look like their static counterparts, but move randomly across the entire playing field by removing tiles on their own. While the mobile ports are an important component for successfully completing a level, the moving blocks usually have the opposite effect, i.e. they can significantly hinder the solution of a level or even make it impossible.
.
At the left side you see the moving port. This turns into a normal static port as soon as it is clicked with the mouse. Just wait to click it until it is in a convenient place on the board where it will be useful for completing your pipeline. You cannot ignore it, because as long as not clicked and integrated, it is considered an unconnected port.
The mobile walls (above: without sand, below: with sand) are not only annoying because they hinder the navigation of the pipes, if ignored they can also cause much greater damage by picking up sand and releasing it at inappropriate places. In the worst case, a mobile wall element (with sand) moving across a target field renders the same unusable. You can prevent this by blocking their paths with the pipes, for example (mobile wall elements only move at a snail's pace), or by enclosing them completely. You can also use the container element to tap the sand from them.
Buttons and displays at the top of the pitch
These 3 buttons are located on the right above the playing field. Clicking on the left button puts all corner pipes in a passive state for 3 seconds, i.e. they cannot connect with other pipe parts during this time. The middle button (for straight pipes) and the right button (for falling sand) have the same function (passive switching).
Furthermore, the following indicators are located on the right above the playing field. The one on the left lights up when a "Wireless Port Connection" has been activated, while the number on the right indicates how many walls are still removable.
Click on this button to start the energy flow at the end of the game. This appears (centrally above the playing field) when the pipeline has been built correctly and all other game conditions have also been met.
When you try it out (perhaps even while watching the videos), you will realise that everything is much easier than it sounds in the above descriptions. Nevertheless, you will often be forced to take back moves.This is easily possible with the UNDO button, which can be used to correct any lack of concentration or tactical misjudgement.
In a few cases, Pipeline reacts very badly when the mouse is clicked too quickly one after the other.This results in empty fields that not only hinder the navigation of mobile elements, but can also make it impossible to find a solution. Once empty fields have been created, they can also expand when neighbouring fields are clicked on.
You can ignore this element behaviour and use the UNDO key whenever it happens, but there is also the option of simply clicking slower with the mouse, as this will not create any unbridgeable empty fields at all.